Win10搭建github page笔记
github page建议使用Jekyll(或hexo)搭建,省去自己配置页面的麻烦,本文主要参考链接:
本文安装环境是win10下的ubuntu子系统,关于子系统如何安装可以参考Windows 10 Installation Guide
1. Ubuntu子系统安装
先使能安装
Enable-WindowsOptionalFeature -Online -FeatureName Microsoft-Windows-Subsystem-Linux
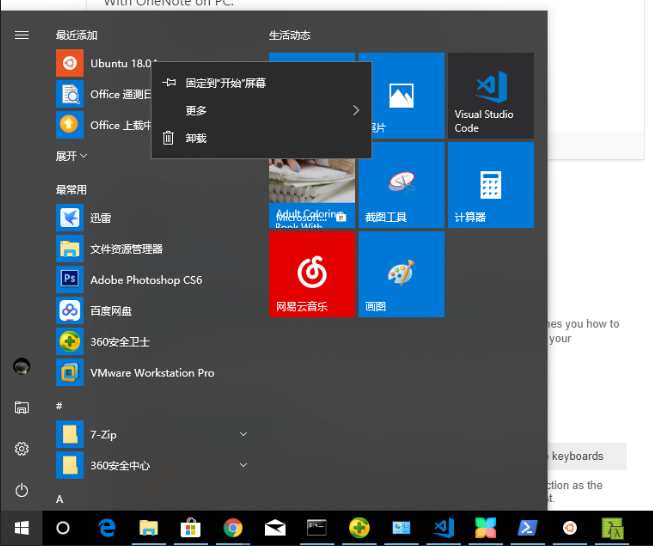
重启电脑,然后直接在windows store上安装即可,建议安装ubuntu18.04,当然ubuntu16.04也没毛病。

这个颜色感觉有点难受,可以从其他终端进入,推荐使用cmder,小巧美观,安装mini版本即可。通过bash命令就可以进入ubuntu了;从图中也可以看出C盘是挂在mnt目录下面的。
安装好ubuntu后第一步一般是更换源,因为默认源速度较慢,甚至可能被墙,其他软件也是同样原理,如ruby和python。ubuntu18.04常用源可以参考博客。
# ubuntu18.04阿里源

deb http://mirrors.aliyun.com/ubuntu/ bionic main restricted universe multiverse
deb http://mirrors.aliyun.com/ubuntu/ bionic-security main restricted universe multiverse
deb http://mirrors.aliyun.com/ubuntu/ bionic-updates main restricted universe multiverse
deb http://mirrors.aliyun.com/ubuntu/ bionic-proposed main restricted universe multiverse
deb http://mirrors.aliyun.com/ubuntu/ bionic-backports main restricted universe multiverse
deb-src http://mirrors.aliyun.com/ubuntu/ bionic main restricted universe multiverse
deb-src http://mirrors.aliyun.com/ubuntu/ bionic-security main restricted universe multiverse
deb-src http://mirrors.aliyun.com/ubuntu/ bionic-updates main restricted universe multiverse
deb-src http://mirrors.aliyun.com/ubuntu/ bionic-proposed main restricted universe multiverse
deb-src http://mirrors.aliyun.com/ubuntu/ bionic-backports main restricted universe multiverse
sudo cp /etc/apt/sources.list /etc/apt/sources.list.old
sudo vi /etc/apt/sources.list
# copy to vi
...
sudo apt-get update -y && sudo apt-get upgrade -y
安装到最后可能会出现dpkg returned an error code (1)错误,原因未知,通过下面命令修复
sudo mv /var/lib/dpkg/info /var/lib/dpkg/info_old
sudo mkdir /var/lib/dpkg/info
sudo apt-get update -y && sudo apt-get upgrade -y
2. 安装jekyll环境
2.1 安装ruby
$ sudo apt-get install ruby-full -y
$ ruby -v
ruby 2.5.1p57 (2018-03-29 revision 63029) [x86_64-linux-gnu]
# 更新rubygem源
gem sources --add https://gems.ruby-china.org/ --remove https://rubygems.org/
# 查看gem源
gem source --list
# 更新缓存
gem sources -u
2.2 安装jekyll和bundler
gem install jekyll bundler
注意,不要使用sudo,因为sudo和不用sudo是不同的环境上下文,上面命令可能会出现You don't have write permissions for the /var/lib/gems/2.5.1 directory类型错误,参考stackoverflow
cd $HOME
sudo apt-get update
sudo apt-get install git-core curl zlib1g-dev build-essential libssl-dev libreadline-dev libyaml-dev libsqlite3-dev sqlite3 libxml2-dev libxslt1-dev libcurl4-openssl-dev python-software-properties libffi-dev

git clone https://github.com/rbenv/rbenv.git ~/.rbenv
echo 'export PATH="$HOME/.rbenv/bin:$PATH"' >> ~/.bashrc
echo 'eval "$(rbenv init -)"' >> ~/.bashrc
exec $SHELL

git clone https://github.com/rbenv/ruby-build.git ~/.rbenv/plugins/ruby-build
echo 'export PATH="$HOME/.rbenv/plugins/ruby-build/bin:$PATH"' >> ~/.bashrc
exec $SHELL

rbenv install 2.3.1
rbenv global 2.3.1
ruby -v
如果出现github上代码无法下载的问题,可以通过浏览器手动下载放到对应目录,上面命令都正常后执行
gem install jekyll bundler
rbenv rehash
3. 搭建github jekyll环境
参考这篇文档即可完成搭建,注意其中几点:
- jekyll虽然之前已经安装,教程中会再次安装,不要紧
source 'https://rubygems.org'建议修改为https://gems.ruby-china.org,提高访问速度- step3中”jekyll”, “3.3.0”找不到,跳过
FAQ
如何卸载ubuntu子系统
很多文章都说是通过下面命令卸载,但是我的环境这样卸载报错了,说什么linux子系统安装动作还在进行中
lxrun /uninstall
所以最后还是通过开始下面的卸载按钮卸载的,只是看不到进度,一般5min内应该会卸载完成。
